New Features in pCon.planner 7.5Print
Your Products in the Right Light with OSPRay
Use the new Shadow Plane setting to create individual images of your product models. With little effort, you can generate product images and visual configuration possibilities for photo-realistic product presentations.
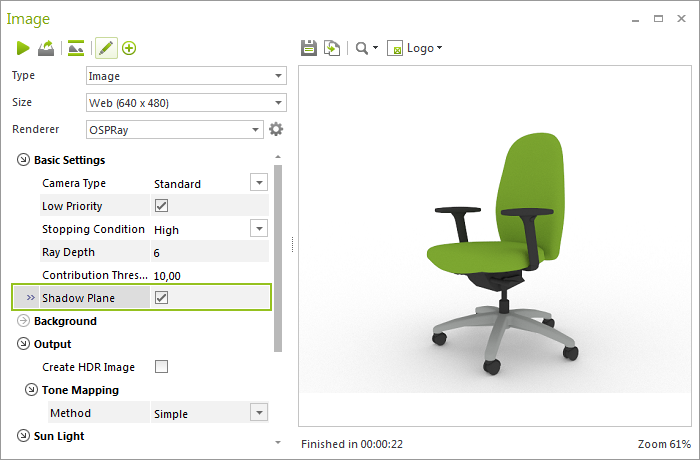
The basis of the setting is a neutral surface area, which provides the depicted object with realistic shadowing.
The product renderings are perfect for further photo editing: In combination with a transparent background, images with shadow display are created and can easily be implemented into office and living landscapes.
Rendering with an open scene also saves on rendering time.
Shadow Plane is integrated with the other OSPRay settings. For your product renderings, we recommend setting Tone Mapping to simple. You can read more about this feature here:
Vector printing quality has also been improved. With pCon.planner 7.5, we have optimized the logistics of the vector printing so that you can print more clearly and efficiently.
Panoramic Images fit for Social Media
Upload your panoramic images online and present them directly in a 360° view. You can do this with panoramas in JPEG format now. pCon.planner 7.5 furnished these images with meta-information that can be displayed as a 360° panorama. Share a view of your plan on Facebook, for example, and the social network will automatically present the JPEG in 360°. Viewers can then use the mouse to navigate through the panorama with ease.
To use this feature: Render a Panorama in the Image dialog. When saving, selecting the file format JPEG. Then, upload the panorama online.
Drawing Element Developments
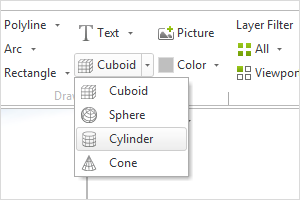
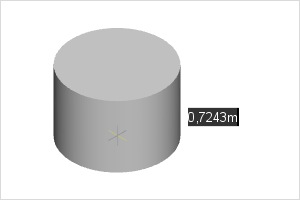
The 3D elements group is growing: In the planning area, the cylinder element has been added next to the sphere, cone and cube elements. You can find this option, as usual, under the Start tab in the Drawing Elements group.
This new feature allows you to create a cylinder in just a few steps. Until now, creating a cylinder required you to first insert a circle and then extrude it.
|
|
Intuitively inserting drawing elements
Once you select a drawing tool in pCon.planner 7.5, your 2D and 3D drawing primitives will be directly attached to the mouse. You can then see the drawing element directly in its future position. Click to place the element in the desired location and then adjust the size and alignment.
For drawing elements (e.g. inserting a rectangle using the center point and a corner point instead of two corner points), you can now select the insertion point before starting the drawing process by pressing Y or using the context menu. This helps ensure that your drawing element is drawn in the correct position.
|
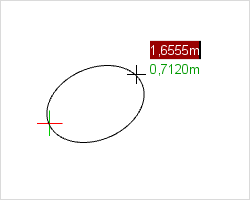
You also no longer have to insert ellipses along the BKS axis. Here, the new drawing process ensures free placement in an area along a freely-selected axis. Subsequent rotation is no longer necessary. |
|
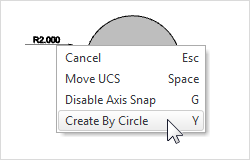
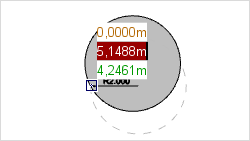
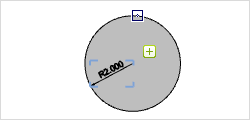
With pCon.planner 7.5, you can dimension even more circular structures. Circular dimensioning is now also possible for circular surfaces without a center point: Using three points, you can create an auxiliary circle. With this, you can set the radius or diameter. This option allows for the dimensioning of diameters for three-dimensional drawing elements or for the curves of object edges. You can find this new option in the context menu.
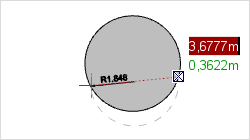
When dimensioning radii, the first click will determine the position of the arrow head. Improved circle dimensioning is also available in the layout area. |
||||||||
|
|||||||||
|
|||||||||
|
Other Changes and Developments
Setting coordinate origin: Additional shortcut
A new shortcut allows you to efficiently relocate the User Coordinate System origin. Press C to change the UCS between three positions.
| 1. | The origin of the World Coordinate System |
| 2. | The user’s last selected UCS position |
| 3. | pCon.planner’s last suggested position |
Relocating the coordinate origin can help when you want to undo the automatic UCS shift during various pCon.planner operations. Simply press C during the respective planning step. Quickly switching the UCS is also beneficial when inserting drawing elements.
UCS when moving: Behavior adapted
When you use the Move tool, the UCS origin will remain at its previously defined position. This behavior corresponds with the handling in pCon.planner 7.3. Using the C key, you can easily switch between the various UCS positions (see previous section).
Positioning dimensions and elements in top view
In Top view, dimensions and drawing elements will now be inserted by default on the zero level of the UCS.
Previously, these elements in top view would automatically be placed on the top edge of the objects within the plan. This behavior corresponds to the drawing of objects in all other views in pCon.planner.
Now, using the corresponding option in the context menu, you can also place the insertion level on top of the already existing walls and furnishings when in top view.
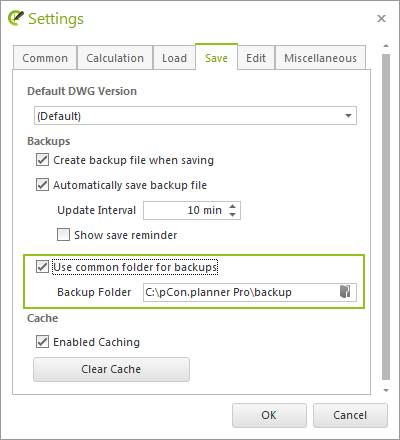
Backup Copies: Everything in one place
A project, a folder, ten plans – quite a few backup copies result. Backup copies offer important protection against errors and crashes. Nevertheless, they can get confusing. This is why we’ve made it possible to define a default path, under which pCon.planner 7.5 will automatically and safely store all of your backup copies. This helps you to manage your directory content and quickly find a backup copy when needed. The path for backup copies can be found in the pCon.planner start menu under the Program Settings, Save tab.
|
|
Application Notice: End of support for 32-bit operating systems and Windows Vista
Starting with pCon.planner 7.5, Windows Vista will no longer be supported. Support for 32-bit operating systems has also been eliminated.
More information can be found in the current system requirements.