New Features in pCon.planner 7.6Print
Expressway through the World of pCon: PEC Format
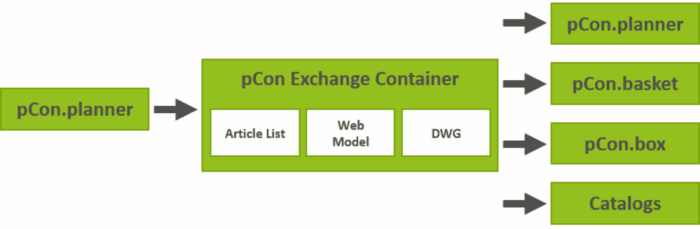
Models, projects, objects: All the right data in all your pCon applications. PEC – the pCon Exchange Container – contains both graphic and commercial information. With this format, you can import articles, custom-made products and typicals from pCon.planner into the pCon.box. Your other pCon applications can also extract suitable data for use.
From pCon.planner into the pCon Universe
In pCon.planner 7.6, you’ll be planning with three dimensional models of your products that have been enriched with commercial information. Joining single objects together into functional groups, finding the perfect chair for a particular desk, creating space – these typicals can be presented to your customers as complete solutions for further applications and can be transferred into other contexts.
Sometimes it may also be necessary to create a custom solution in which you construct a model and subsequently use the Article Toolbox to produce a user article with price, manufacturer information, etc.
Your work in pCon.planner is therefore the basis for product presentations, the sales process and product of-fers. With the PEC export, you can transfer these solutions to all other pCon applications.
PEC-Content for the pCon.box and Co.
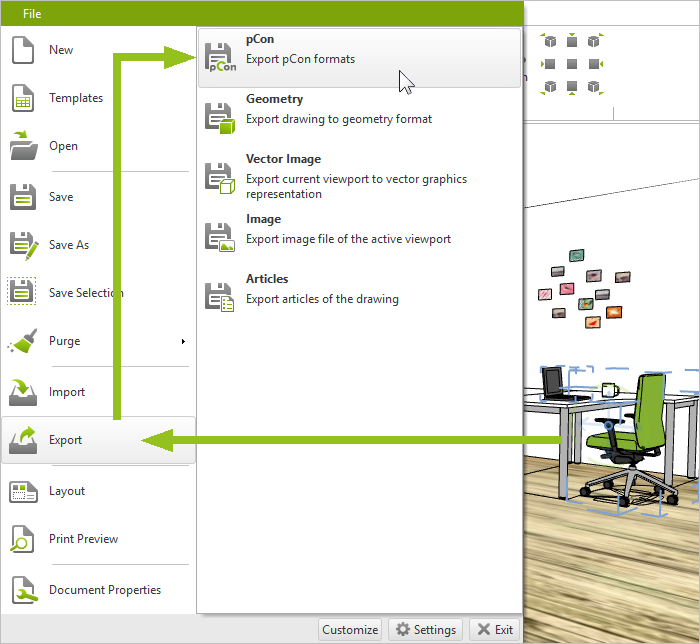
Select your desired object in pCon.planner. This might be a complete group of furniture – in other words a typical – it could also be an item from your catalog, a user article or a sub-article from a group of furniture. Once selected, open the application menu and click Export. Choose pCon Exchange Container (*.pec) from the list on the right-hand side of the file menu.
A file with the suffix *.pec will be exported. You can then open this file in the desired program, such as pCon.basket or the pCon.box. The spaces between the elements, all configurations, the settings for each product, and individual changes will remain the same.
Display Desired Information Anywhere with Just One File
| • | Planned in the planner, opened in the box – and that with the desired product combinations, all configurations, commercial information, and correct spacing and hierarchy. PEC content without 3D representation, for example, can be transferred into the pCon.box as an image including commercial information. |
| • | Display commercial data from the PEC package in pCon.basket: The contained products will automatically be inserted into your article list. |
| • | Export product data for your catalog using PEC format: In this case, model and article information are integrated – typicals will be a part of pCon.catalog and your customer catalogs. |
Improvements in Print and Layout
Improved Performance and Print Output
We’re polishing the performance: In pCon.planner 7.6, the real-time display of your print pages runs even smoother. The printing process itself has also been improved. With consistent quality, printed PDF files are now smaller.
Improved Print Output for Text
In pCon.planner 7.6, text, dimensions and annotations are clearer when printed. Text fields printed as PDFs are also automatically recognized as text fields (which, for example, ensures that the texts can be copied from the PDF).
Support for AutoDesk® DWG 2018
Continuous compatibility: pCon.planner 7.6 supports the new DWG Format 2018.
Dynamically Change Text Field Width
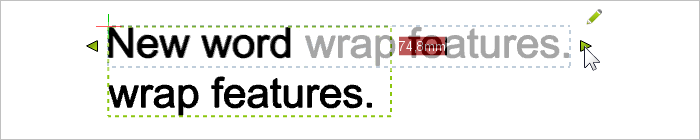
New text wrapping options: The width of a multi-line text field can be dynamically changed using the new interactor found on the edge of the field. The text is then wrapped appropriately. Alternatively, you can provide a set Word Wrap Width in the Properties Editor.
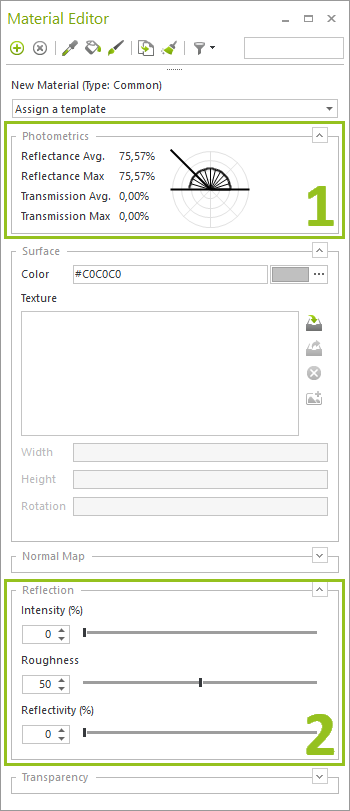
Light and Reflection in the Material Editor
|
Display and change the photometric properties of your materials – made possible in the new sections of the Material Editor:
|
In the 7.6 version of pCon.planner, cameras can also be used in orthographic view. You can find the Camera Mode for the selected camera in the Properties Editor. Here you can choose between Perspective and Orthographic.
An orthographic camera can help you quickly switch to the clear orthographic mode – using the camera as an anchor to a specific position within the plan.
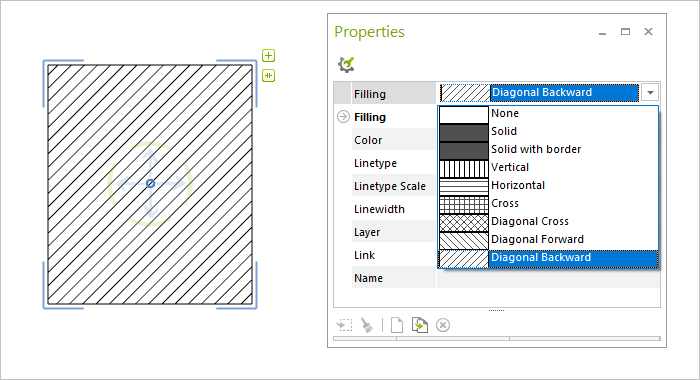
Hatching for 2D drawing elements can be assigned through the Properties Editor. There you can retrieve all additional filling options for various types of hatching for individual drawing elements. The well-known hatching tool continues to exist in parallel.