New features in all versionsPrint
Please note: We now provide update downloads via our pCon.planner website. As usual, we will continue to notify you as soon as an update is available for the application. In future, this notification will contain a link that will take you directly to the update site.
Experience the new pCon.planner user interface. Version 7.0 has been given much more than a fresh new look: its stream-lined tabs and dialogs are fine-tuned to the typical stages of a planning process and offer quick navigation, an excellent overview of functions and efficient workflows.
A right click in pCon.planner 7.0 not only opens the context menu but also a dynamic mini toolbar. This provides quick access to important functions for the current step in the process.
Would you like an overview of the new features? Find out more about the new user interface and on the contents of the ribbon:
|
|
||
|
|||
|
|
|
The Toolbar: All your tools just a click away
The new Toolbar, located on the right-hand side of the work area, gives you direct access to all the important tools in pCon planner. Properties editor, Layer dialog, pCon.catalog and much more – everything you need is just a click away.
The relevant Help section shows you which functions you can call via the Toolbar, how you can dock tools onto the work area and how you can add more features to the Toolbar:
|
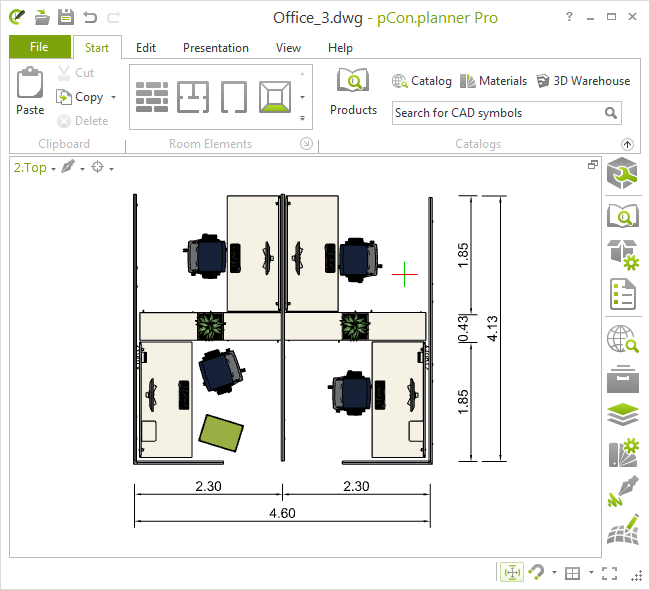
A search field for models from pCon.catalog has been added to the new user interface. The new Catalogs group offers a shorter route to finding high quality furnishing objects and materials. |
New Catalogs group on the Start tab |
|
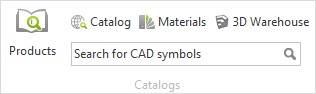
You can use the Room Settings dialog to set standard values, e.g. for the heights and widths of Windows and Doors. These and other dimensions are set in the Room Elements group in the Start tab. Click on the arrow at the lower edge of the group to open the Room Settings dialog. The values entered here are adopted for all doors and windows that you subsequently insert into your planning.
|
|
|
Create 3D models for Impress in pCon.planner 7
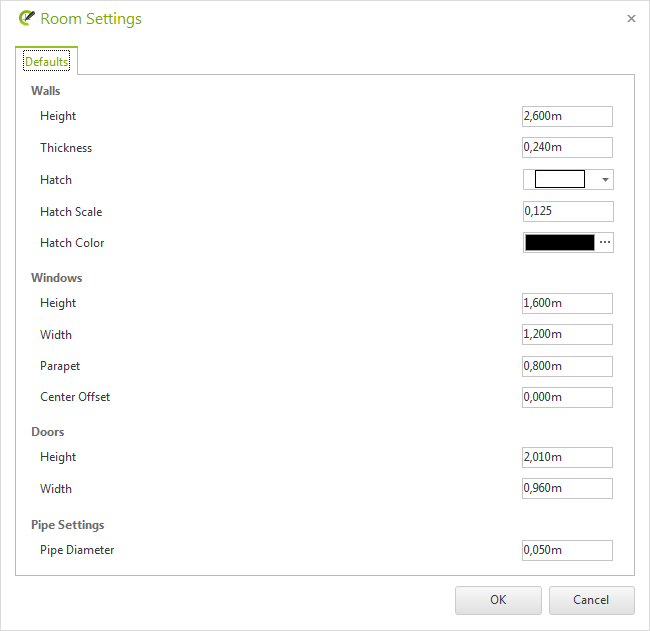
Planning and presentation go hand-in-hand with pCon.planner 7 and Impress, the EasternGraphics online presentation service. Using the new 3DWeb export feature, you can generate 3D models for your online presentations. View furniture groups interactively in Impress, zoom into details or rotate the model in the room in any way you wish.
3DWeb models are created via the Application menu. Under Export, you will find the option Geometry where you select the file type EasternGraphics 3DWeb (*.3dweb). You can find further information about this feature here:
|
3DWeb tile opened on the new version of Impress |
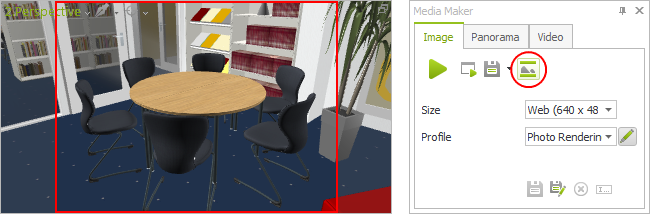
Frame for image area in Media Maker
Beim Berechnen von Bildern und Videos aus Animationen können Sie ab der neuen Version einen Rahmen einblenden lassen. So sehen Sie direkt, welcher Bereich Ihrer Planung in Ihrem fotorealistischen Rendering oder Ihrem Video abgebildet sein wird.
|
Frame marking image area and corresponding button in Media Maker |
For all editions, printing is now based on a uniform technology. Print your draft designs quickly and easily in high quality. The advanced settings are now the same in both the Standard and PRO Editions.
pCon.planner Standard now offers an enhanced print preview function. Here you can adjust the paper format settings, alignment and margins directly via the Properties editor and view all the changes immediately in the viewport. You can find out how to call the print functions in the new pCon.planner and other information in the corresponding Help sections:
|
Print Preview tab |
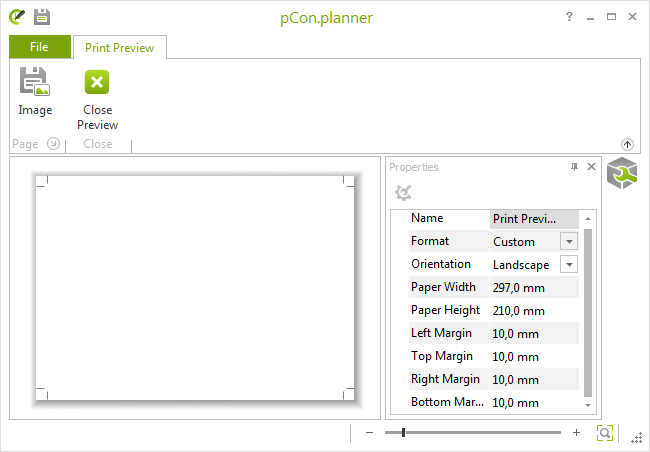
Output of print views as image
From pCon.planner 7 you can save a Print Preview or a Layout Page as an image. You can use the image button in the dynamic tab Print Preview or in the Layout area (pCon.planner PRO). The button is located in the group Page, to output the preview in a standard image format (for example *.png).