New Features in pCon.planner 7.4 PROPrint
Source Background Image: iStock.com/Michael Bischof
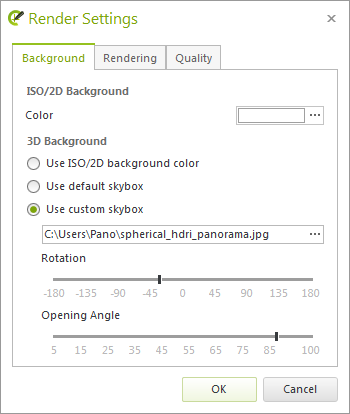
Use a spherical panorama as the background image. It must have a height-to-length ratio of 1:2 and should be as high quality as possible.
The background image will remain visible in every planning until it is changed again.
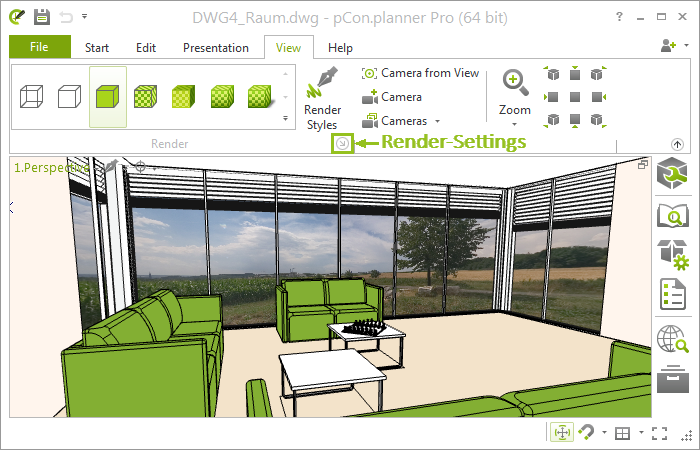
Render settings and image output always side by side
The image output dialog is now connected to the Image or Video dialog. During the rendering process, there will be no new window in the way: You will be able to see the progress of your rendering as well as your settings at all times.
Why is this so important? You’ll see in the next section!
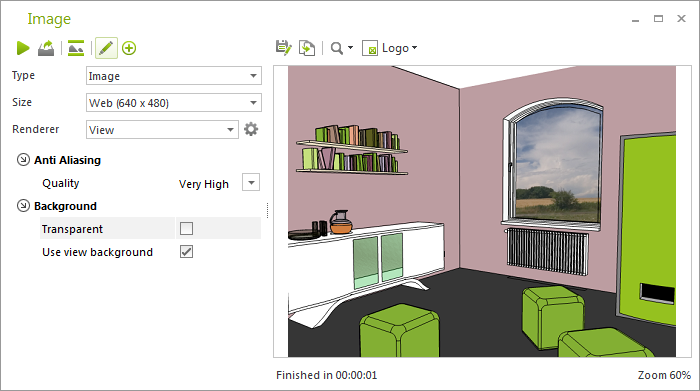
The rendering has begun, but you can already tell it’s going to be too dark? Simply change the Tone Mapping setting. Now you can do so while the image is being rendered –without starting over!
All in all, rendering with OSPRay is much more user friendly now. Unlike in pCon.planner 7.3, you can change many of the settings while your image is being created. A manual restart of the rendering process is no longer required.
In addition, OSPRay gets more efficient: Your image will be rendered in less time while keeping magnificent quality.
It is now possible to change several OSPRay settings while an image is being rendered. These changes will then be directly inherited for the final image. It is also possible to make changes to further parameters during the image calculation; however, some will lead to a restart of the rendering process.
Note: You can even change the Tone Mapping and Background after the rendering is complete!
OSPRay repertoire continues to expand
So, you can use a background image from your plan when rendering now, but that’s not your only option: In addition, you can set your own panorama using the Image dialog. You can then adjust the Rotation and Opening Angle directly within the OSPRay settings. The previous need to align or move the entire plan is no longer necessary.
The Rotation option is also available when using HDRI images as a light source. That way, your light is always coming from the desired direction.
Tone Mapping settings have also been revised. You can read more about this in our online pCon.planner Help Center.
What’s also nice: Self-illuminating materials and the Architect camera type, like those available for Yafaray, are now available when rendering with OSPRay, as well.
More overview in the Image dialog: Rendering Profiles moved
In the new version, you will find your Render Profiles dialog to the right of the Renderer selection. This clarifies the overview of the selection, as the chosen Renderer determines which profiles are available.
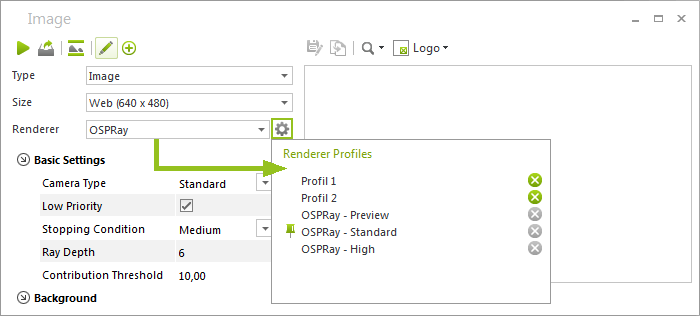
Note: This new arrangement also applies to the Video dialog.
|
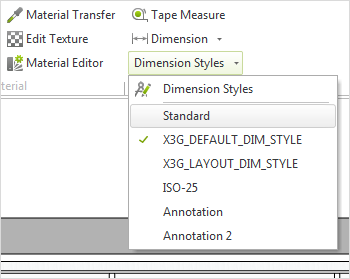
It’s now possible to use dimensions in the Layout area! This way, you can plan with more flexibility – no dimension lines in the design area and no visibility settings – since dimensions can often disturb visibility, but are a necessary part of the work process. |
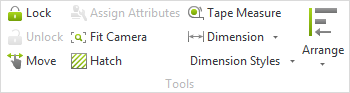
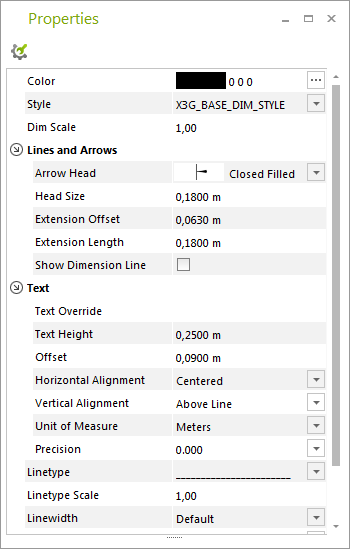
In the Layout area, various types of dimensions as well as the Dimension Styles dialog are available.
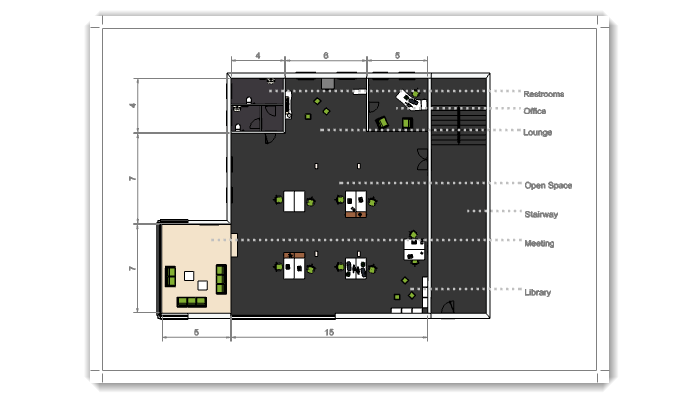
Dimensions are available for all 2D viewports as well as isometric perspectives. Dimensions from the layout area are not transferred into the design area.
Note: You still have the opportunity to set dimensions in the design area, of course. The dimension style is selected separately in the design and layout areas. With this, for example, size ratios can be adjusted to the scale of the layout page.
Professionally Arrange Printed Pages
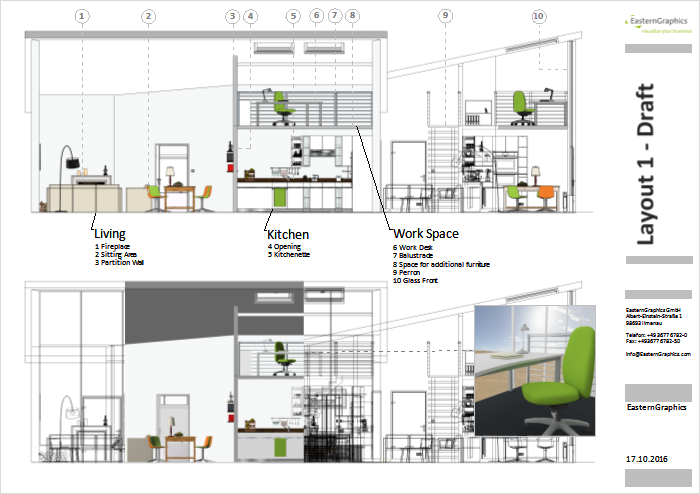
Align viewports and their content to one another
One printed page, several viewports – and all of the content nicely and neatly aligned? With pCon.planner 7.4, there are new ways to organize your layouts.
|
For each 2D viewport or isometric view, you can now set a Snap Point and position it freely. You can then use this point to arrange the content of your viewports. Set each window with the same dimensions and your layout will immediately look more organized, even with several viewports involved. |
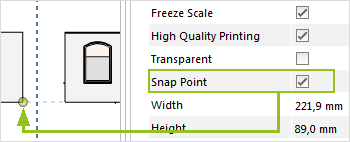
To keep it safe, enable Freeze Scale in the Properties Editor. This way, the content of the active viewport is protected against zooming.
When you insert and position a new viewport, pCon.planner helps you by marking the center of the view. This allows you to find the appropriate size and position in relation to the objects on your layout page.
Move your objects to the printed page: as a further acquirement from the design area, the Move tool is now available for you in the layout area.
Select it in the design area, find it in the layout
Your selections in the planning view are retained when switching over to the layout view and are visible in the active (double-clicked) viewport. When you select objects in the workspace and then insert a new viewport, you will also have access to the selected objects.
This will help you find the part of your plan that you want to focus on for the printed page. By clicking on Hide Others, the selection is released – just a few more clicks and you’ll have inserted the view of a single piece of furniture.
You could also use the following method: Select a 3D object in the layout, switch to the view of the plan and directly edit your selection.
Objects on their own printed-page layers
All objects that you insert into your printed pages – whether drawing elements, stamps, text, viewports or other elements – are now on their own layout layers. This way, they are separated from the layer structure of the design area.
Several New Dimension Features
You can do much more with dimensions in pCon.planner 7.4. You’ll find suitable tools for even more objects and 2D elements within your plan. The dimensions packet is also available in the layout area.
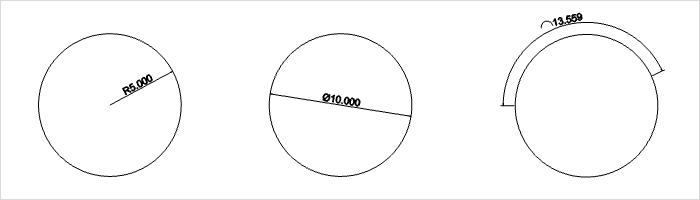
Dimensioning radii, diameter and arcs
Round out your dimensions with the new features for diameter, radii and arc dimensioning. With these three new dimension types, nothing is standing in your way of complete plan dimensions – not even excessive free form curves or your own individual constructions.
You can easily transfer your Dimension Styles to other plans. Click on the Import button in the Dimension Styles dialog and select a DWG from your file system. All styles included in this DWG will then be inserted into your current plan and can be used for further planning.
|
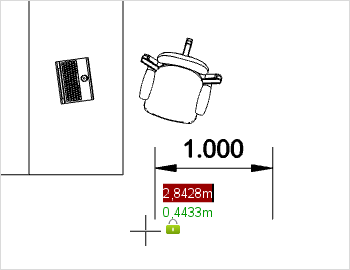
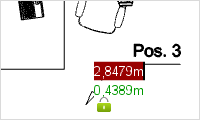
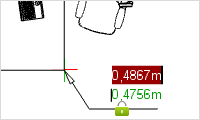
pCon.planner 7.4 guides you through the dimensions more quickly. Once you select the type of dimension, the dimension is attached directly to the mouse. Set it in the right place and you will always see which point you have to click next. |
Further Developments and Improvements
Share Model: Familiar function, new location
The Share Model button has found its new home on the Presentation tab. As usual, this gives you the opportunity to upload a 3D model of your furniture or an entire group of furniture items online or to share them via link with colleagues, customers and friends.
Improvements for Commercial Articles
The positioning of commercial articles has been improved. If you’ve rotated an article and are unhappy with its orientation, simply select the article and choose the command Reset Rotation from the context menu.
With the new program version, you can copy Set Articles in an instant. Until now, the Copy command copied a single piece of furniture within a set. Now, by clicking Copy Set Article within the Article Toolbox, the complete Set Article will be duplicated and can be inserted into the plan as a new set.
|
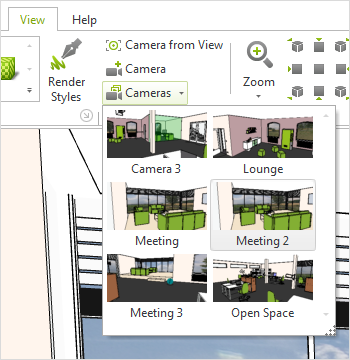
When selecting a Camera in the View tab, you will now see a thumbnail image. This makes it easier than ever to select the desired camera. A new, organized camera area in the View tab allows for more efficient work. |
New functions in the Media Browser
The Media Browser has been supplemented with a quick filter, making it more convenient to search for content. You can also use the context menu to determine whether you want to display subfolders for the current directory or only individual files.