New Features in pCon.planner 8.8Print
Properties Editor: New Register View and Enhanced Features
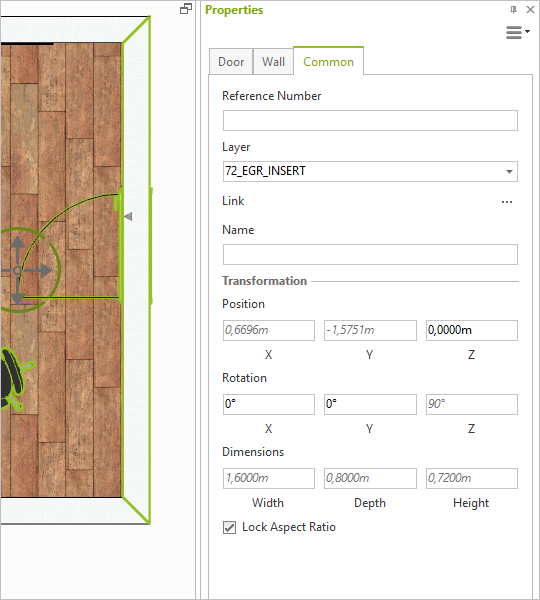
A new view mode for operating the Properties Editor makes your work easier. The Structured View comes with the following improvements:
•Object properties are even more neatly arranged.
•More structure when multiple objects are selected: the properties of the selected objects are dis-played in separate tabs.
•Working on selected objects becomes easier. Input fields are always active and can be edited with only a few clicks. New editors – for example sliders for continuously variable values – are an additional simplification of your planning process.
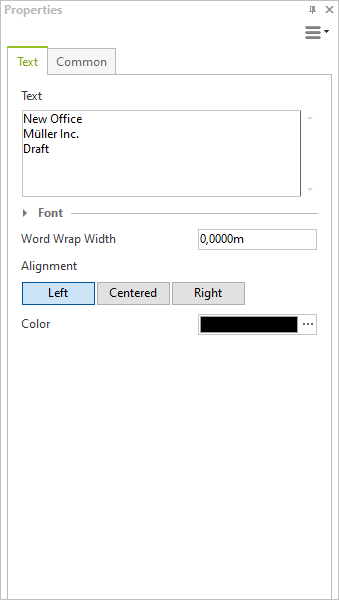
•Multiline texts can be edited directly in the Properties Editor.
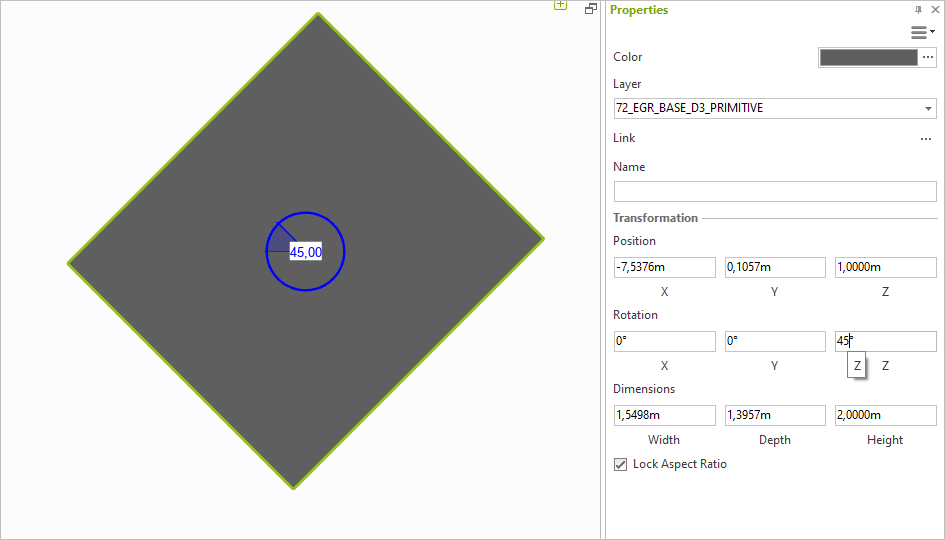
•Highlighting in the work area visualize to which value the transformation of properties (see chapter 2) is referring.
|
|
|
|
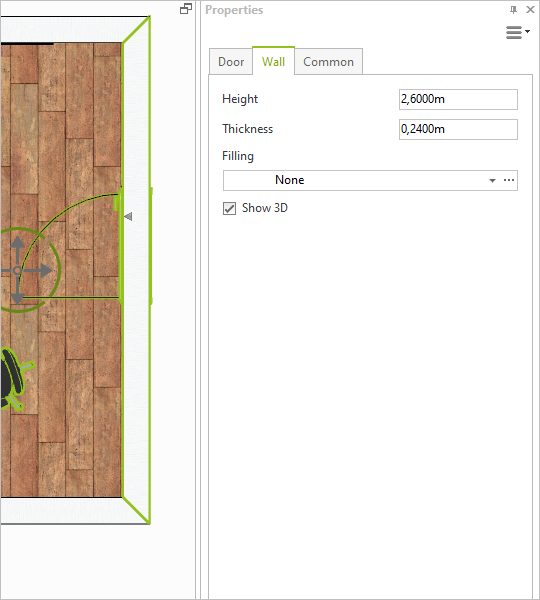
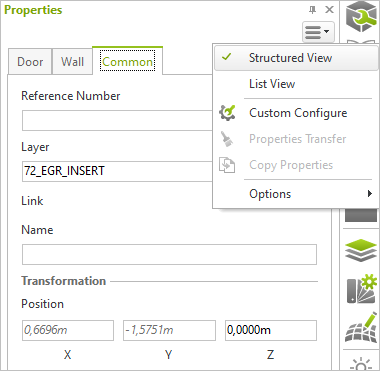
The conventional view of the Properties Editor is also still available. Switch to this view by opening the hamburger menu at the top right of the Properties Editor and selecting List View. Use Structured View to switch back to the new mode. In the List View, the Properties Container for the transfer of properties from one object to another is still available.
|
|
Arrange objects: Transformation
The Properties Editor contains the new Transformation area. Transformation is used to change Position, Rotation as well as Dimensions of your selected objects. Transformation is available in the Structured View as well as in the List View of the Properties Editor (see chapter 1).
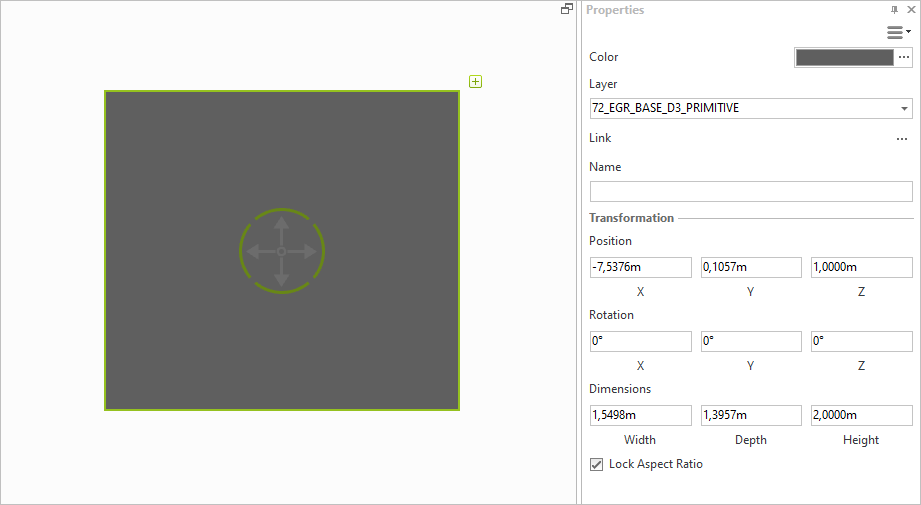
Transformations can be applied to all of your selected objects. Depending on the type of element selected, some of the input fields in the Transformation area are grayed out because these specific operations are not available for the respective object.
Multiselection is available. This makes it possible, for example, to alter the positions of multiple selected objects at once.
The Benefits
•Simplified moving in height or to the zero plane even in Top view
•Setting identical rotation for multiple objects (for example aligning chairs)
•Fast incremental moving (for example current value + 10 cm)
•Alternative way to scale objects: enter new size directly, even for multiple objects at once
Applying Transformations to Objects
1.Select the object you want to transform. In order to transform or move several objects at once, use multiselection.
2.Enter the new values to the respective input fields of the Properties Editor.
3.Press ENTER to adopt the new value. Alternatively, press the TABULATOR key. This way, your value is adopted while the cursor moves to the following input field.

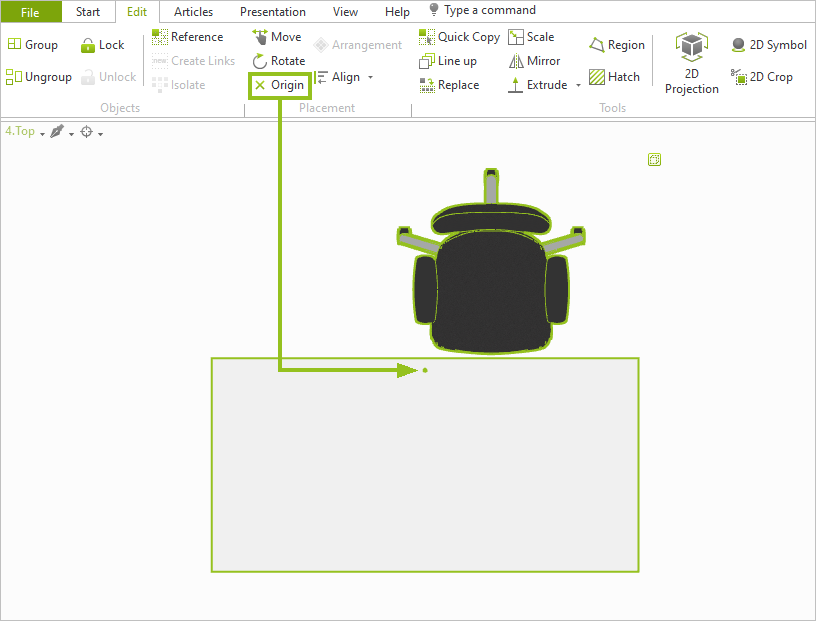
New Origin Tool
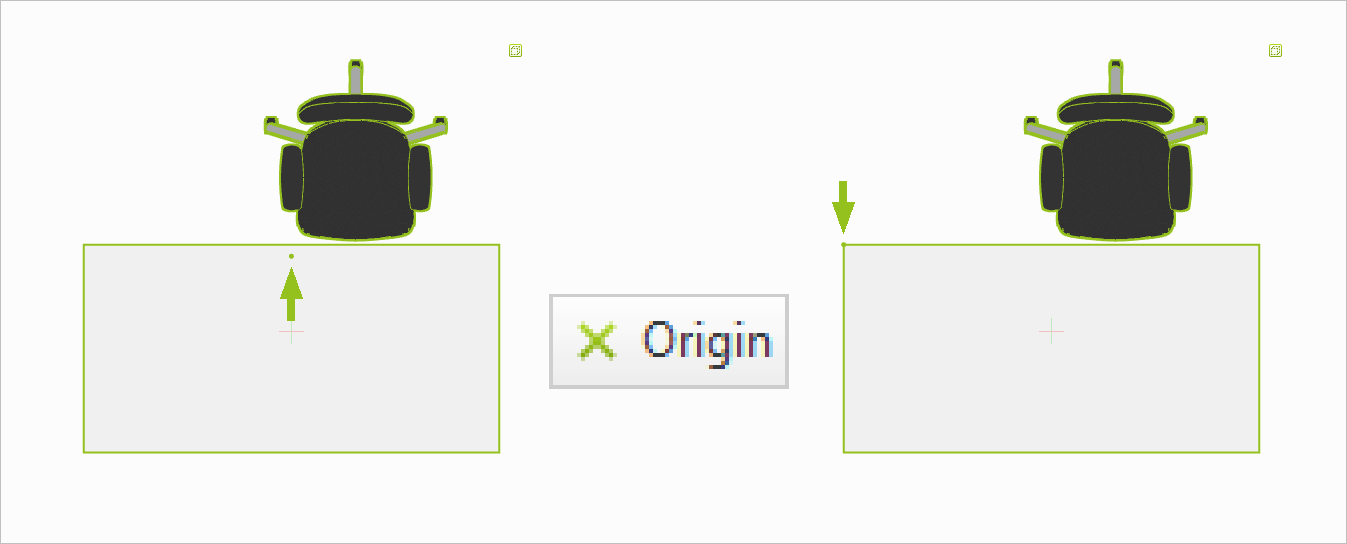
With pCon.planner 8.8, each group in your drawing receives its own origin, which is displayed in the form of a green dot. With the Origin tool, you move the common origin point for a group of objects. The origin helps you plan, modify, and move with accuracy.
The origin shows the relative distance of the group to the origin of the world coordinate system in the Transformation area of the Properties Editor. If you move the origin, the values in the Properties Editor change accordingly.
Origin can be found on the Edit tab, Placement group.
Proceed as follows o use the origin:
1.Select multiple objects in your drawing and use the Group command (Objects group on the Edit tab) to create a group from your selection.
2.The origin of the group will now be displayed. Initially it is placed centrally between the elements of the group.
3.To move the origin to a different place, select your group and click Origin (Edit tab).
4.Use your cursor to set the new position of the origin within your working space.
5.Confirm the new position with a single click.
The origin becomes visible whenever a group is selected.
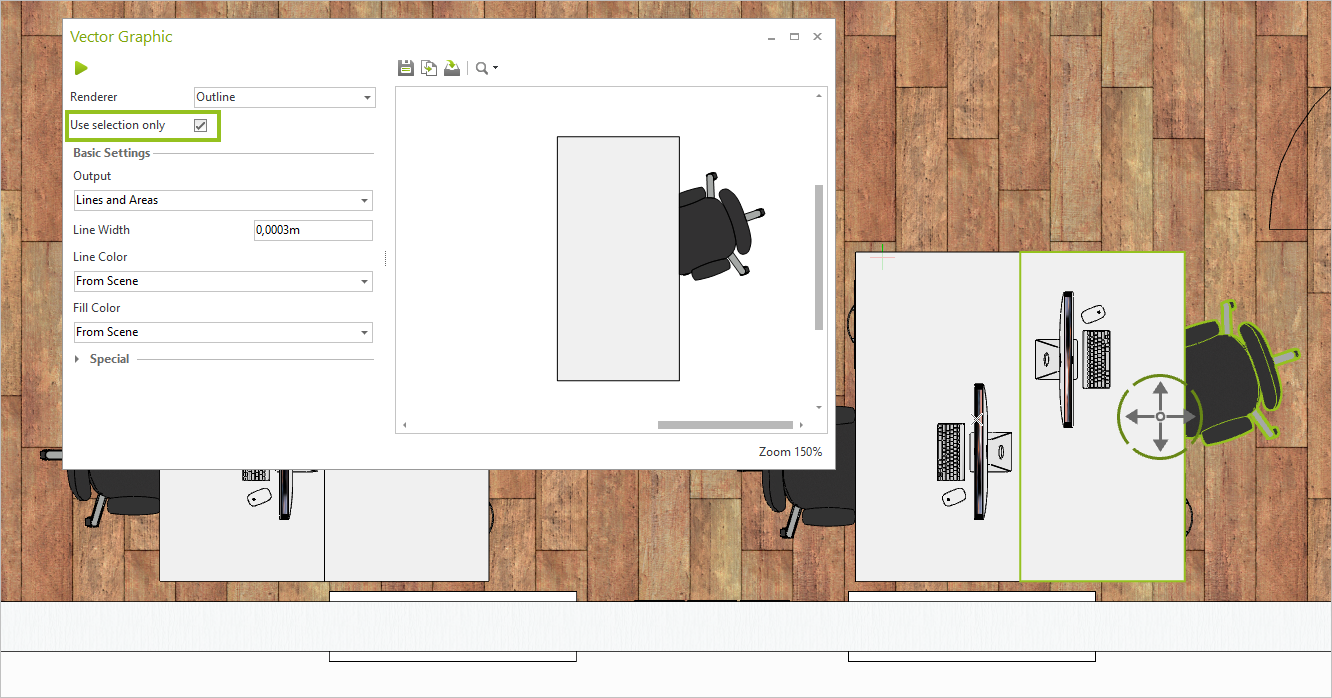
Improvements for the Creation of Vector Graphics (STD and PRO)
Create Vector Graphics from Selection
With pCon.planner 8.8 you generate a vector graphic from a selection of objects in your drawing. The advantage is that you no longer have to hide the other elements before calculating a vector graphic.
1.Open the Vector Graphic dialog.
2.Set the desired view on the drawing and select the objects for which you want to create a Vector Graphic. Multiselection is possible.
3.Check Use selection only in the Vector Graphic dialog.
4.Press the Start button in the dialog.
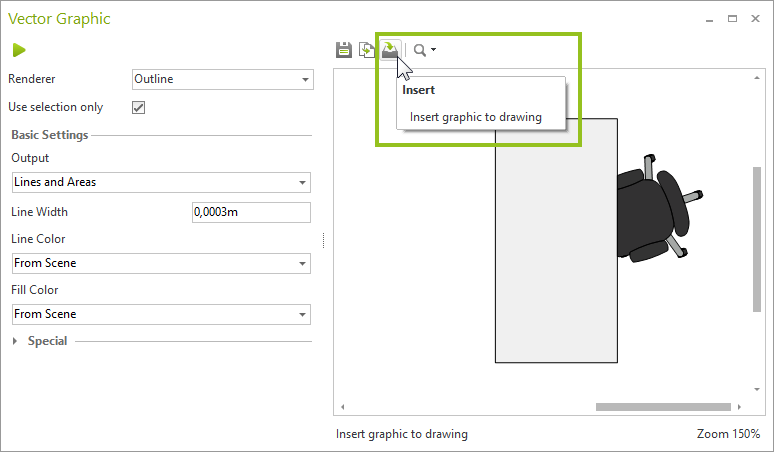
Quick Insertion for Vector Graphics
You can now insert a new vector graphic directly into your drawing with just a few clicks. After clicking the Insert button in the Vector Graphic dialog, the graphic is attached to your mouse cursor and can be placed.
Changes Regarding Articles and Commercial Data (ME and PRO)
Finding the Manufacturer of a Selected Article in the Catalog
Backwards search for articles via the manufacturer catalog:
1.Select an article in the drawing.
2.Open the Products catalog and click the Find Article button.
3.the corresponding manufacturer's catalog is opened and the selected article is displayed in the catalog.
Find Article is also available from the context menu. Select your article and use a right click on the work area to open the context menu. Clicking Find Article will open the Products catalog.
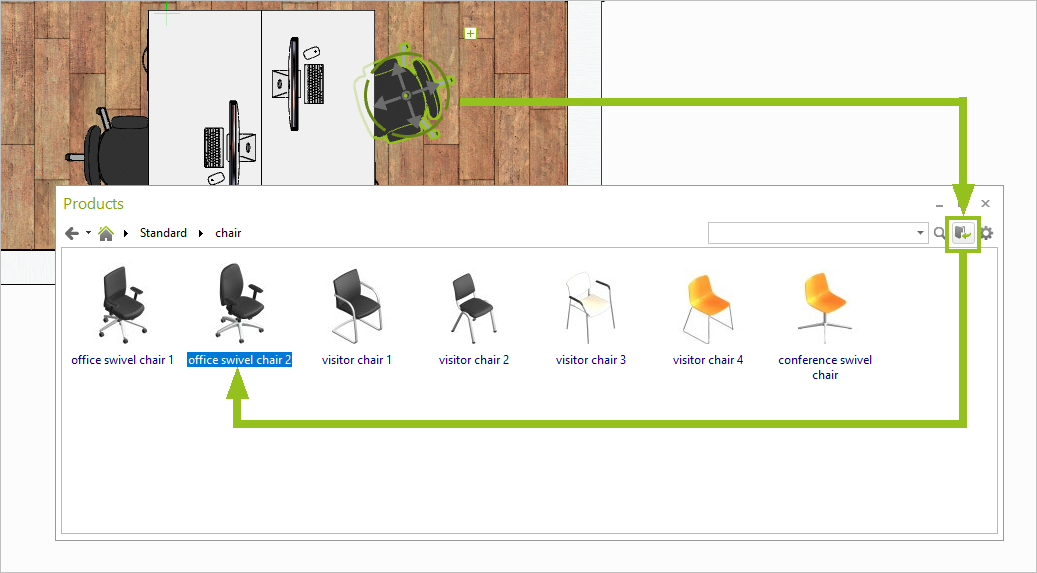
To find a selected article, the corresponding manufacturer catalogs have to be installed.
Copying the Article List: Smooth Transfer to pCon.basket
Copy > Article List generates additional HTML code. The code is copied to the clipboard and can be pasted to the online version of pCon.basket by using STRG+V.
Improvements for OAP
The new OAP enhancements, like for example message output, are supported by pCon.planner 8.8.
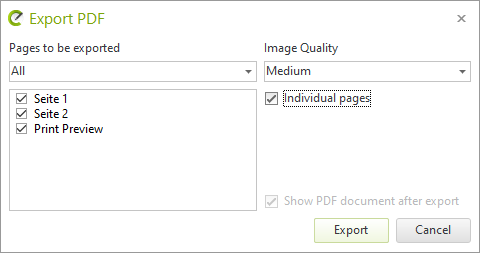
Layout: Better Handling of PDF Export (PRO)
|
The PDF export has a new checkbox: Individual pages. If this is activated, pCon.planner creates a separate PDF file per layout page. Furthermore, we have improved the page selection process for the export: You can always select your Layout pages directly from the page list. It is no long-er necessary to set a selection mode via the drop-down menu. |
EOX import in all editions
The EOX import now allows the exchange between our online world (e.g. pCon.roomplanner) and all editions of pCon.planner.
New USD Import (STD and PRO)
pCon.planner 8.8 provides a new USD (Universal Scene Description) import. Files in the exchange formats USD, USDZ, USDC as well as USDA can now be imported top pCon.planner.
DGN Import (PRO)
We support loading and import of geometries in the DGN format.
STL: Import for Bigger Files (STD and PRO)
With the new version, the import of STL files with a size of more than 4 GB is possible.
SKP: Enhanced Support for Texture Names
The SKP import does now support texture names with special characters.
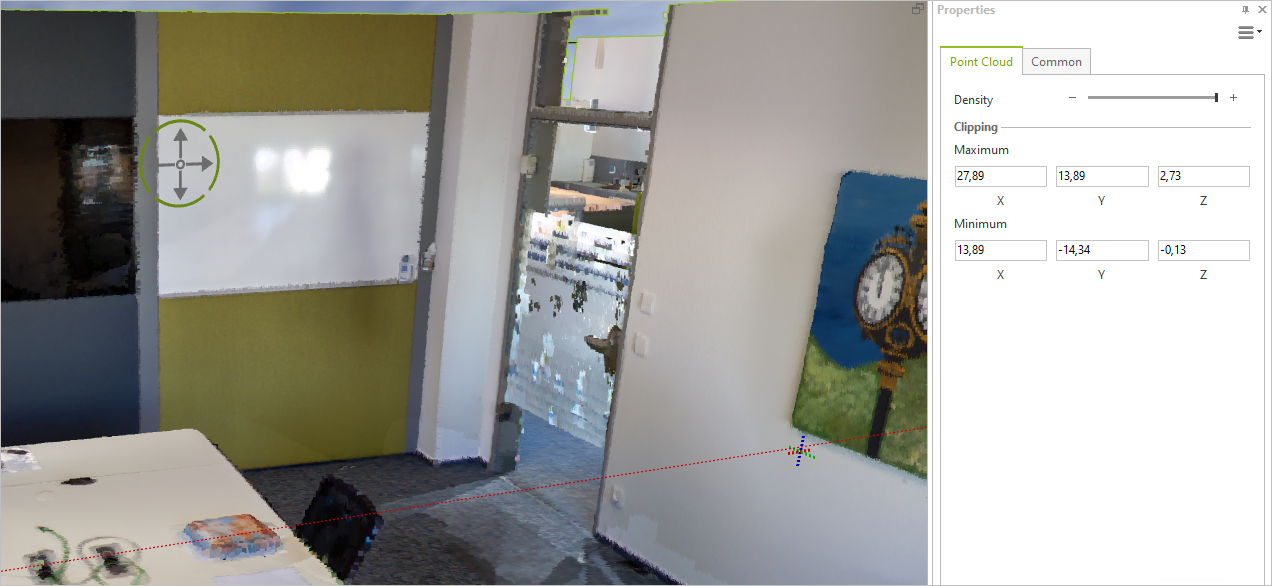
Import Scanned Rooms via Point Clouds in E57 Format (PRO)
The new E57 format is used to import scanned 3D objects. Objects and environments are captured and transferred to your drawings as point clouds. This import serves as a basis for the depiction of environments or for the remodeling of objects.
Settings for the density of the displayed points as well as options for cropping the scanned point cloud can be found in the Properties Editor.
E57 files are not imported into your DWG file. Only the file name is saved with the DWG. If the DWG is reopened, the point cloud is restored from ist file. The E57 file has therefore got to be passed on together with the DWG file.
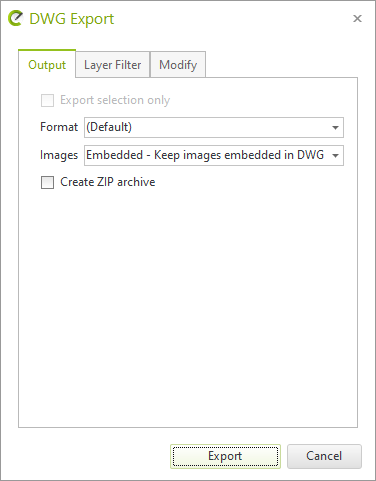
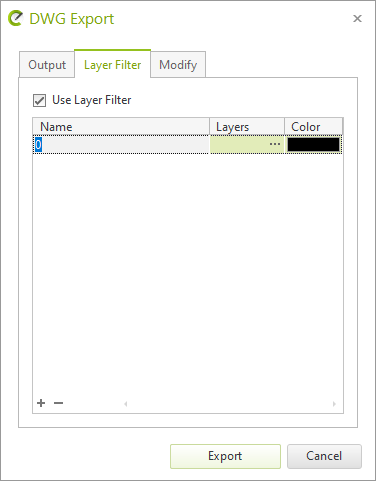
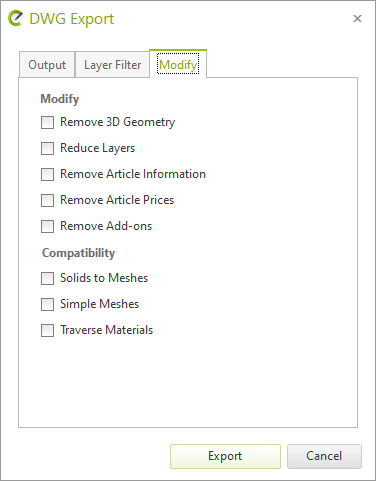
New Features in DWG Export
The DWG Export dialog contains enhanced settings for targeted preparation of your files for external editing.
The dialog does now contain three new tabs. The features on them include:
•A layer filter to preselect layers for export (Layer Filter tab). This is where you export a set of layers to a new target layer and, if required, specify a color for the target layer.
•Advanced preferences (Modify tab); here, the removal of product information and article prices have been added as new options.
•Basic settings for export (Output tab): Here you decide, among other things, whether you want to create a DWG with embedded images, export the images to the same directory as the DWG or to a sub-folder.
|
|
|
3DS: Export of Bigger Files
With the new version you can export 3DS files larger than 4GB.
Faster Image Rendering with OSPRay
The calculation of photorealistic images with OSPRay now works even faster and smoother and with fewer image artifacts.
More Efficiency for Batch Rendering (RPO)
The export of render jobs to the external Batch Rendering service does now work even quicker. In addition, textures with a higher resolution can be used for the external image calculation.
Please note: In order to use the external Batch Rendering Service (BRS) with pCon.planner 8.8, updating the service is mandatory.
Real-Time Rendering with even Smoother Switching to Quick Rendering
Work more efficiently in complex drawings: The switching of the real-time display to the quick rendering (checkbox Use Quick Rendering on the Quality tab of the Render Settings) has been optimized and accelerated.
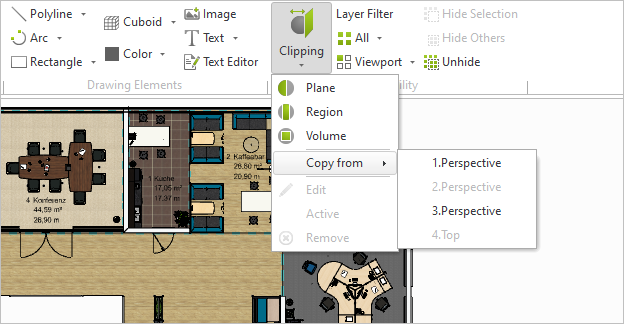
Copy Clippings
Clippings are now easily copied from one work area to another:
1.Define a Clipping in at least one of your viewports.
2.Activate the viewport in which you also want to apply this clipping.
3.Open the Clipping menu (Start tab) and click Copy from.
4.Pick a clipping from the menu.
It is also possible to adapt a Clipping from the working area into a Viewport on your Layout page.
Efficient Filtering in Material Editor and Media Browser
Analogous to the Layer filter, the filter lines in the Material Editor as well as the Media Browser now allow advanced searches. For example, + or - prefixes can now be used for the search.