Features and extensions in all versionsPrint
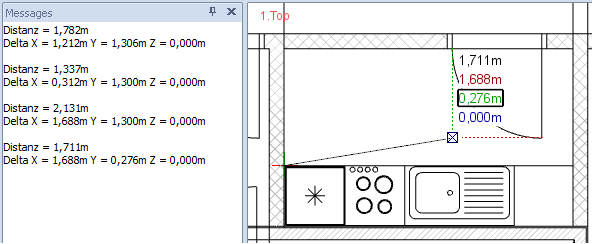
The measure tape has been integrated into the Standard version from pCon.planner 6.6 onwards. Its functions have also been extended. Not only the distance between the start and finish points but also the corresponding distances along the X, Y and Z axes are shown.
The selection frame controlled from the Tab key is used to select one of the distances shown. The value last selected will always be copied onto the clipboard automatically when the measure tape tool is closed. It can then be used in subsequent operations by inserting (CTRL + V).
In the PRO version, a list of all the values calculated with the measure tape will be recorded. This list will be shown in the message window (found on the Configuration tab). Each value listed can be copied (CTRL+C) and inserted into the dialog field of other operations and tools (CTRL+V).
improvement of the purge command
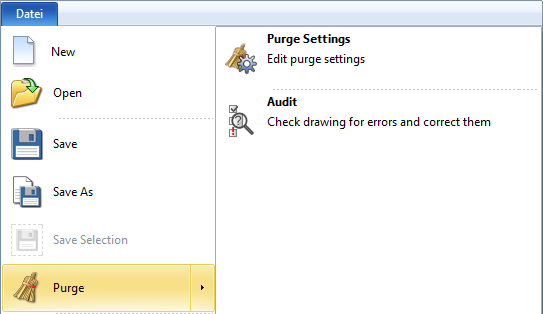
There are two sub-options in the File menu of the Purge command of pCon.planner 6.6. It is now possible not only to purge but also to make a separate check for errors. The previously available purge dialog can be pulled up from the Purge Settings menu. Any settings already made will control the elements to be purged when the Purge button is clicked.
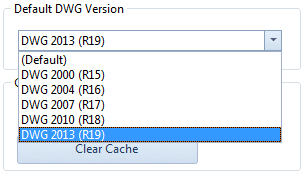
The new version also supports the 2013 DWG format (R19). There is the option of selecting it in the dropdown menu for File Type during all saving operations or geometry exports. The default format is still DWG 2010 (R18). It is possible to change this individually in the application settings on the Save tab. |
|
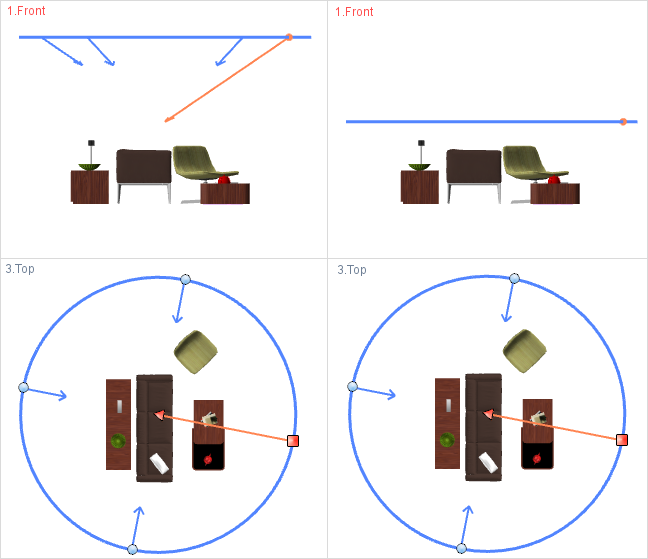
From pCon.planner 6.6 onwards, there are two insert options for the circle animation procedure. Clicking on the New à Circle Animation buttons on the Animation tab enables you to choose between the two settings Eye Height and Target Height in the Properties dialog before you start drawing the circle for the animation.
In Eye Height mode, not only the target height but also an angle of view is entered. The default angle is 30°, which gives the effect of a bird’s eye view. The worm’s eye view is created by placing a minus sign before the angle applicable to the animation view.
In Target Height mode, it is not an angle of view but the height that is set.
The screenshots below show two circle animations, each of them from the front and top view. In the screenshot on the left, the animation shown has been set to the Eye Height insert mode. The height set is 1.5m and the viewing angle is 30°. On the right, the Target Height mode has been used. The values for Target Height and Eye Height are the same in each case, at 1.5m.